

A damaged chimney on your Markham roofline is far more than a minor cosmetic issue. When outdoor masonry begins to crumble, crack, or pull away from the roofline, it threatens the weatherproofing and structural integrity of your entire residence. The masonry structure of your chimney stands directly exposed to the elements, taking the full brunt of snow, driving rain, and extreme temperature fluctuations. Left untended, minor surface degradation quickly turns into deep water penetration, compromising flue tiles, attic framing, and interior drywall. Markham Chimney Services provides thorough, honest, and reliable masonry assessments and repairs designed specifically to withstand harsh local weather patterns.
Located at 4418 Highway 7 East, Markham Chimney Services operates as an independent chimney and fireplace maintenance company. We assist homeowners throughout our local Markham neighbourhoods and across the Greater Toronto Area with practical, durable chimney restoration. Whether your older brickwork requires careful mortar repointing, your concrete crown has cracked open, or your chimney stack requires a complete rebuild from the roofline up, we bring careful craftsmanship and honest assessments to every project. We focus on durable building practices that keep your heating systems drafting safely and your living spaces warm, dry, and protected from the elements year after year.
Chimney Masonry Near Me: visit summary
Chimney Masonry Near Me in Markham: cracked brick, loose mortar and weather damage assessed and repaired before water gets in. Serving Markham and the Greater Toronto Area (GTA). The estimated local market range is $450 – $4,800, not a fixed company rate. The final scope and quote are confirmed before work begins.
| Estimated market range | $450 – $4,800. All estimates are in Canadian dollars and exclude 13% Ontario HST. |
|---|---|
| Typical time | 1 to 3 business days depending on chimney height, scaffolding needs, and scope |
| Price factors | Height, roof pitch, and ease of scaffolding access; Severity of brick deterioration and depth of joint repointing required; Scope of work from minor tuckpointing to a full structural tear-down and rebuild |
| Routine signs to discuss | Spalling or Flaking Brick Faces; Cracked or Crumbling Mortar Joints; Efflorescence Stains on Brickwork; Visible Lean or Bowing Chimney Stack; Damaged or Eroding Chimney Crown; Damp Stains on Attic Ceilings |
Understanding Chimney Masonry and Your Roofline Anatomy
A masonry chimney is a layered, precision-built system designed to guide hot combustion gases out of your living space while shielding your roof from severe heat and exterior weather. The exterior structure consists of clay or shale bricks bound together by a specialized mortar mix designed to support heavy dead loads while breathing moisture out. Inside this brick enclosure sits the flue liner, which is usually constructed from vitrified clay tiles, stainless steel pipe, or poured refractory cement. Understanding how these components cooperate helps you recognize why external brick deterioration can eventually impact internal flue function.
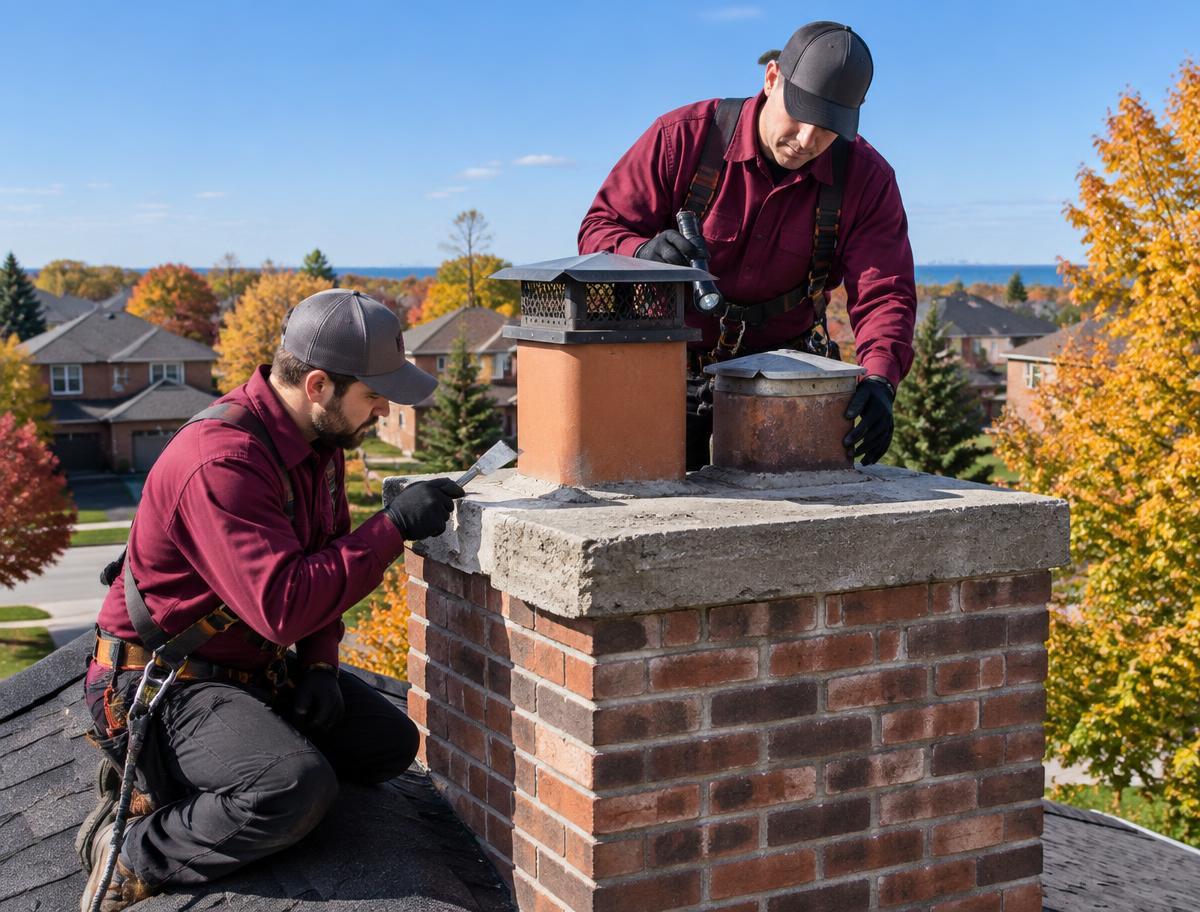
At the summit of the chimney sits the chimney crown, often confused with the chimney cap. The crown is a concrete slab poured over the uppermost course of brickwork, slanted slightly downward to shed rainwater away from the flue openings and down onto the roof rather than allowing it to soak into the masonry core. Directly beneath the crown, the brick chimney stack descends toward the roof penetration, where sheet metal flashings seal the seam between the vertical masonry and the sloped roofing shingles. If any one of these structural components develops an opening, water quickly exploits the breach.
When homeowners overlook their chimney masonry, they often mistake surface wear for harmless weathering. However, bricks are naturally porous and function much like dense sponges. If the exterior surfaces lose their structural protection, water begins to collect in the interior pockets of the brick and mortar. Once water penetrates into the core of the masonry structure, it quickly migrates inward toward roof trusses, ceiling joists, and attic insulation. Preserving the outer masonry envelope is therefore your home's primary line of defence against expensive structural rot, interior mould growth, and drafting failures.
- Exterior brick courses provide structural mass, exterior protection, and thermal ballast.
- Mortar joints cushion individual bricks while acting as a sacrificial barrier against moisture.
- The chimney crown diverts rain and snow melt away from internal flue liners.
- Roof flashings create a waterproof seal between vertical brick stacks and roof sheathing.
- Flue liners safely contain toxic exhaust gases and channel smoke upward.
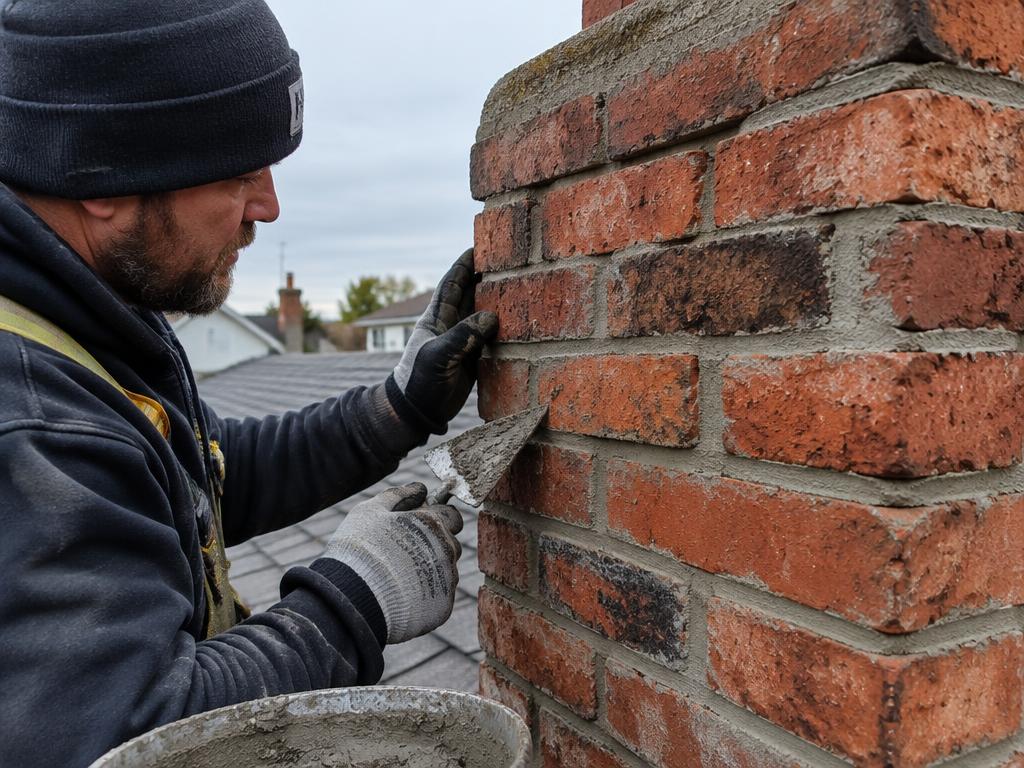
Protect your home from water damage with dependable chimney masonry restoration built for Ontario winters.
Self-check
Warning signs you need chimney masonry near me
Spalling or Flaking Brick Faces
When moisture penetrates deep into brick pores and freezes, the hard exterior face pops off. Spalling bricks shed gritty red fragments onto your shingles, leaving soft interior clay exposed to accelerated seasonal decay.
Cracked or Crumbling Mortar Joints
Mortar joints should feel firm and solid. If the mortar has turned sandy, developed open fissures, or recessed more than half an inch behind the brick edges, the wall has lost its water resistance and compressive strength.
Efflorescence Stains on Brickwork
White, powdery deposits coating your exterior or interior chimney walls are crystalline salt residues known as efflorescence. This staining proves that water is continually traveling through your masonry assembly, dissolving minerals and weakening the internal structure.
Visible Lean or Bowing Chimney Stack
A chimney that tilts away from the roofline or bows along its vertical profile indicates significant internal foundation settlement or collapsed structural mortar beds. A leaning stack represents an urgent structural risk requiring immediate professional assessment.
Damaged or Eroding Chimney Crown
Horizontal cracking, chipping, or missing chunks on the concrete top slab allow rain and melting snow to run directly into the brick core. Crown failures rapidly accelerate freeze-thaw damage throughout the upper chimney courses.
Damp Stains on Attic Ceilings
Water stains, peeling paint, or dark mould near the chimney in your attic or upper ceilings indicate failed step flashing or water penetrating through saturated masonry joints, bypassing the roof covering completely.
The Destructive Power of Southern Ontario Freeze-Thaw Cycles
The regional climate in Markham poses unique, severe challenges to exterior masonry structures. Unlike regions that experience stable sub-zero winters or mild rain seasons, southern Ontario experiences frequent, drastic temperature shifts. During late autumn, winter, and early spring, temperatures regularly climb above the freezing mark during sunny afternoons, only to plummet significantly below zero after sunset. This rapid fluctuation produces the destructive freeze-thaw cycle, which is the single greatest cause of premature chimney failure in our local neighbourhoods.
When snow accumulates on the flat top of a chimney crown or drifts against the vertical brick courses, mild afternoon sun melts that snow into liquid water. Because brick and standard mortar are porous materials, this moisture is absorbed deeply into the capillary pathways of the masonry. As the sun sets and temperatures drop, that absorbed water freezes into ice. Water expands by roughly nine percent upon freezing, generating tremendous internal hydraulic pressure within the microscopic pores of the brick. This expansion forces the face of the brick outward and splits mortar apart from the edges.
Over the course of a single winter, this freeze-thaw mechanism repeats dozens of times. What began as an imperceptible hairline fracture in November expands into a major fissure by March. Bricks undergo spalling, a process where the baked outer face shatters and drops off, exposing the soft, highly porous inner core of the brick to accelerated weathering. Without timely intervention, the structural mortar turns to loose sand, bricks shift off-level, and the entire chimney structure becomes vulnerable to collapse during heavy windstorms or severe snowfalls.
- Porosity allows cold meltwater to penetrate deep into structural brick and mortar channels.
- Water expansion of nine percent exerts destructive internal pressure on surrounding masonry.
- Repeated freeze-thaw cycles pop brittle brick faces off, a condition known as spalling.
- Mortar joints erode into powdery aggregate, losing their compressive load-bearing capability.
- Winter winds and heavy snow loads destabilize loosened brickwork atop your roofline.
Repointing Versus Rebuilding: Determining the Necessary Masonry Solution
Homeowners often ask whether their failing chimney requires minor mortar repair or an extensive masonry rebuild. Repointing, frequently referred to as tuckpointing, is an effective maintenance procedure used when the bricks themselves remain structurally sound but the mortar joints between them have deteriorated. During repointing, failing mortar is mechanically raked out to a uniform depth, the joints are cleaned of dust, and fresh, compatible mortar is packed tightly into the voids. This restores structural cohesion and water resistance without disturbing the position of the brickwork.
In contrast, a chimney rebuild is necessary when the structural integrity of the chimney stack is deeply compromised. If multiple courses of brick have shifted out of plumb, if the mortar has turned completely to dust through the entire depth of the wall, or if extensive spalling has shattered the internal structure of the bricks, repointing alone will not solve the issue. A rebuild involves dismantling the chimney course by course down to sound, uncompromised masonry, which may be at the roofline, below the roofline, or down to the foundation footing, followed by reconstructed masonry.
Selecting the right path forward requires an honest appraisal of the brickwork condition. Attempting to point mortar over loose, crumbling bricks simply conceals hazardous defects behind a cosmetic veneer, allowing hidden water damage to continue unabated. Conversely, tearing down a chimney that merely needs joint renewal and crown maintenance creates unnecessary expense for the homeowner. Our diagnostic approach evaluates the depth of deterioration, checking both the external faces and internal stability, so you receive the most practical, cost-effective restoration solution.
- Repointing preserves existing, structurally sound brickwork by renewing crumbling mortar joints.
- Joint preparation involves raking old mortar back to a solid depth before new application.
- Partial rebuilds remove damaged bricks down to solid, stable courses above the roofline.
- Full rebuilds reconstruct the chimney from the roof deck or foundation when structures lean.
- Appropriate repairs restore structural integrity without incurring unnecessary reconstruction costs.
The Chimney Crown and Flashing: Exterior Shields Against Moisture
While bricks and mortar form the main body of a chimney, the crown and roof flashing provide the critical moisture protection that shields the entire system. Builders frequently construct chimney crowns using leftover masonry mortar instead of structural concrete. Mortar lacks the tensile strength to withstand outdoor weathering, leading to premature shrinkage cracks and rapid water intrusion. A properly engineered chimney crown must be poured from reinforced concrete, featuring an adequate thickness and an overhang that casts dripping water completely clear of the vertical brick walls.
Equally vital is the sheet metal flashing system installed around the base of the chimney where it cuts through the roof sheathing. This connection requires a two-piece flashing system consisting of base flashing and counter-flashing. The base flashing attaches securely to the roof deck beneath the shingles and bends upward against the brick wall. The counter-flashing is embedded into the mortar joints of the chimney and folds downward over the base flashing. This overlapping design allows the chimney and the wooden roof framing to expand and contract independently without tearing the waterproof barrier.
When flashings fail, water travels along the outside of the chimney stack, quietly soaking into attic insulation, ceiling drywall, and surrounding wooden roof rafters. Homeowners often mistake this issue for an active roof leak, hiring roofers who apply heavy layers of petroleum-based roofing tar over the seams. Tar is a temporary patch that soon dries, shrinks, and cracks under direct sun exposure. Restoring failing flashing requires removing damaged metal, cleaning the masonry joints, and securing fresh corrosion-resistant flashing metal tightly into the brickwork.
- Reinforced concrete crowns shed heavy rain and snow melt safely away from the flue opening.
- Proper crown overhangs create a drip edge that stops water from trickling down brick surfaces.
- Two-part flashing accommodates natural building movement between the roof framing and masonry.
- Temporary tar applications dry out, crack, and trap moisture against the brick substrate.
- Corrosion-resistant metal flashings ensure continuous, long-term attic leak protection.
"I needed a new chimney cap. The installer arrived in Angus Glen, walked me through cap options, and fitted the perfect one with care. Cleanup was spotless and now I feel protected against rain and pests."
Our process
How we handle your chimney masonry near me, step by step
- 1
Detailed Roofline and Attic Assessment
We examine the chimney stack, crown, flashing, and interior attic access point to pinpoint the root source of water entry and assess overall structural stability.
- 2
Site Protection and Scaffolding Setup
We construct secure roof scaffolding and lay protective tarps across your shingles and landscaping to prevent damage from falling mortar, dust, and heavy tools.
- 3
Damaged Material Extraction
Our technicians carefully remove deteriorating mortar joints using diamond blades and take down cracked, spalled, or unstable brickwork without disturbing sound adjacent structural courses.
- 4
Precision Masonry and Mortar Application
We lay matched replacement bricks using climate-appropriate mortar formulations, pack repointing joints thoroughly, and pour or patch reinforced concrete crowns designed to shed moisture.
- 5
Site Cleanup and Final Quality Check
We clean all newly installed brickwork, inspect the integrity of counter-flashings, clear roof debris, remove scaffolding, and perform a complete final review with you.
Fireplace Safety, Drafting Physics, and Carbon Monoxide Prevention
Chimney masonry is directly linked to the safe, effective operation of your home heating appliances, whether you burn natural firewood, run a gas fireplace insert, or vent an oil furnace. To vent smoke and toxic combustion byproducts away from living spaces, a chimney relies on natural draft, which is created by the difference in density between hot rising gases and cooler outside air. If exterior masonry develops holes, gaps, or internal breaches, cold outdoor air leaks into the flue, chilling the exhaust gases and killing the chimney draft.
A weak or collapsing draft causes smoke spillage, sending dangerous fumes back into your living rooms and family areas. More critically, incomplete combustion produces carbon monoxide, a colourless, odourless gas that poses extreme health hazards to building occupants. If interior flue tiles crack due to shifting external masonry, carbon monoxide can escape through mortar gaps and migrate directly into living spaces, attic cavities, or upstairs bedrooms. Maintaining solid masonry walls ensures that this lethal gas remains strictly contained within the exhaust path until it exits outdoors.
Every home with a fuel-burning appliance or an open fireplace must maintain operating carbon monoxide alarms on every level, especially near sleeping areas. In addition to testing alarms monthly, routine physical inspections of the chimney masonry help identify compromised venting paths before dangerous indoor air quality hazards arise. Sound masonry walls keep external cold air out and dangerous exhaust gases safely inside the flue, ensuring your heating appliance runs cleanly, efficiently, and safely throughout the cold winter season.
- Natural drafting requires an airtight flue pathway free from cold air infiltration leaks.
- Cracked or shifting masonry cools the flue, leading to poor drafting and room smoke rollout.
- Compromised chimney walls allow colourless, odourless carbon monoxide to seep into living zones.
- Carbon monoxide alarms must be installed on every level of the home and tested regularly.
- Solid exterior brickwork maintains balanced thermal conditions for clean, reliable chimney venting.
Adhering to Sound Masonry Standards and Safety Guidelines
Delivering durable chimney masonry repairs requires strict adherence to sound construction practices and recognized building standards. In Ontario, residential masonry work must align with municipal building codes and national fire safety principles, reflecting the high benchmarks established across the heating and masonry trades. These guidelines dictate structural details such as the minimum height a chimney must extend above the roofline, clearances from combustible materials, and the structural thickness required for safe exterior venting walls.
One essential standard is the ten-foot, two-foot rule. A chimney must terminate at least three feet above the highest point where it penetrates the roof deck, and it must stand at least two feet higher than any portion of the building structure located within a horizontal distance of ten feet. This geometric requirement prevents roof eddies and turbulent wind currents from pushing smoke back down the chimney flue. When modifying or rebuilding a chimney stack, maintaining these structural dimensions is vital to preserve dependable draft and satisfy safety standards.
Equally important is the selection of compatible materials. Historic homes across Markham often feature soft, low-density clay bricks laid with lime-rich mortar. If a contractor repairs an older chimney using modern, extremely hard Portland cement mortar, that dense mortar will prevent natural moisture vapor transfer. When winter freezing arrives, the rigid mortar breaks the softer historic bricks apart. Sound masonry principles demand that the replacement mortar matches the compressive strength, porosity, and thermal characteristics of the original masonry assembly.
- The three-foot, two-foot roofline height clearance rule prevents wind-induced downdrafts.
- Adequate structural clearance from wooden rafters and attic framing prevents structural fire risks.
- Mortar formulations must match original brick hardness to avoid crushing historic brick faces.
- Breathable masonry assemblies permit trapped internal moisture vapour to evaporate safely.
- Sound building practices conform to Ontario building guidelines and fire protection principles.
Routine Maintenance and Homeowner Preservation Strategies
While major masonry repairs require professional equipment and experienced bricklayers, homeowners can take several straightforward steps to extend the working lifespan of their chimney stack. The first step is performing visual ground inspections twice a year, ideally in late spring after the frost departs and again in mid-autumn before snow falls. Using a pair of binoculars, scan the exterior walls for signs of spalling bricks, cracking concrete crowns, tilting structures, or plants taking root within mortar joints.
Moisture management around the roofline is another critical maintenance priority. Ensure that roof gutters and downspouts remain clear of fallen leaves and debris, particularly in areas where roof valleys discharge water near the base of the chimney stack. Gutter overflows can saturate the lower courses of brickwork, accelerating freeze-thaw damage and washing out mortar joints prematurely. Trimming overhanging tree limbs also allows morning sunlight to dry the masonry, reducing the risk of moss and lichen growth on damp mortar.
Applying a breathable, silane-siloxane-based water repellent can provide an added barrier against wind-driven rain. It is critical to never apply waterproof silicone sealants, oil-based paints, or standard exterior house paint over exterior brickwork. These impermeable coatings form a plastic-like film that traps interior moisture vapour behind the surface of the brick. When temperatures drop below freezing, that trapped moisture freezes solid, blowing the entire face off the brickwork beneath the paint layer. Always opt for breathable, vapor-permeable masonry protectants.
- Conduct ground-level visual chimney inspections each spring and autumn using binoculars.
- Keep roof gutters clear to prevent water from splashing directly against lower chimney masonry.
- Cut back overhanging tree branches to maximize sun exposure and speed moisture evaporation.
- Never apply non-breathable exterior house paint or silicone sealants over exterior brick surfaces.
- Use vapour-permeable, breathable silane-siloxane water repellents to reduce liquid water absorption.
Choosing the Right Local Chimney Mason in Markham
Selecting the right masonry professional to repair your chimney requires careful consideration. A chimney is a working ventilation component subject to elevated temperatures and severe weather. You need an experienced tradesperson who understands both the structural physics of masonry and the thermodynamics of fireplace venting systems. When speaking with local trades, inquire specifically about their experience repairing residential chimneys in older Ontario neighbourhoods, where structural settling and freeze-thaw wear are common.
Always verify that any contractor working on your roof carries comprehensive commercial general liability insurance and active Workplace Safety and Insurance Board coverage. Roofing and scaffolding work carry inherent physical hazards. Choosing an uninsured contractor leaves you vulnerable to significant financial liability should an accident occur on your property. A trustworthy local company will willingly supply proof of insurance, explain their safety procedures, and provide written estimates that break down the scope of work clearly and transparently.
Finally, pay attention to the contractor's approach toward material matching and clean work practices. A skilled chimney mason will take the time to locate replacement bricks that harmonize with the color, texture, and size of your existing structure. They will also outline their cleanup procedures, explaining how they plan to catch falling debris and protect your lawn, landscaping, and delicate roof shingles throughout the project. Taking the time to select a dedicated, transparent local specialist guarantees that your chimney repairs remain durable, safe, and visually appealing.
- Ensure the contractor carries full liability insurance and active WSIB workplace coverage.
- Demand clear, itemized written quotes explaining material specifications and timelines.
- Confirm that replacement brick and mortar colours match the architectural style of your home.
- Ask about rooftop safety protocols, ladder securing practices, and staging platforms.
- Verify that cleanup protocols safeguard your roof shingles, gutters, and ground landscaping.
Average pricing in Markham
$450 – $4,800
- Inspection / diagnostic
- $150 – $250 for comprehensive roofline assessment, credited toward completed repair work
- Typical time on site
- 1 to 3 business days depending on chimney height, scaffolding needs, and scope
- Parts and materials
- Replacement bricks, mortar compounds, precast or poured crowns, and custom metal flashings
- What moves the price
- Height, roof pitch, and ease of scaffolding access · Severity of brick deterioration and depth of joint repointing required · Scope of work from minor tuckpointing to a full structural tear-down and rebuild
Estimated local market range, not a quote. All estimates are in Canadian dollars and exclude 13% Ontario HST. Your exact price is confirmed before any work begins.