

A clogged clothes dryer vent compromises your home safety, comfort, and monthly utility expenses. When moist lint and laundry debris accumulate inside your exhaust ductwork, heated air cannot escape freely to the outdoors. Your dryer works significantly harder, laundry cycles take twice as long, and internal operating temperatures rise to dangerous levels. In Markham neighbourhoods, where multi-level houses and finished basements often feature extended vent runs with multiple directional turns, lint builds up quietly inside walls and ceilings. Overlooking this hidden ductwork invites moisture damage, accelerated appliance failure, and preventable domestic fire hazards that put your entire household at unnecessary risk.
Markham Chimney Services delivers dedicated, methodical clogged dryer vent cleaning designed specifically for our local residential housing stock. Operating from 4418 Highway 7 East, our team brings specialized venting knowledge, mechanical rotary brush systems, and strong extraction vacuums directly to your doorstep. We evaluate your entire exhaust pathway, from the appliance transition collar behind the dryer to the exterior hood damper mounted on your brick or siding. Whether your exhaust line vents through an exterior wall, rises through a second floor attic, or terminates near a garden soffit, we restore open, compliant airflow while safeguarding your home against structural moisture and thermal hazards.
Clogged Dryer Vent Cleaning: visit summary
Clogged Dryer Vent Cleaning: lint cleared from the duct and exterior hood to cut fire risk and shorten drying times. Serving Markham and the Greater Toronto Area (GTA). The estimated local market range is $179 – $389, not a fixed company rate. The final scope and quote are confirmed before work begins.
| Estimated market range | $179 – $389. All estimates are in Canadian dollars and exclude 13% Ontario HST. |
|---|---|
| Typical time | 1 to 2 hours typical on site |
| Price factors | Total duct length and number of directional elbows between appliance and outdoors; Vent exit location such as ground level, second storey exterior wall, or steep roof pitch; Severity of clog including wet lint sludge, bird nests, or detached concealed joints |
| Routine signs to discuss | Extended Drying Cycles; Excessive Exterior Cabinet Heat; Musty Odours on Clean Laundry; Inoperative Outdoor Vent Flapper; Burning Odour in the Laundry Room; Excessive Lint Accumulation Behind Appliance |
Understanding Comprehensive Dryer Vent Cleaning
Dryer vent cleaning is a specialized mechanical service that clears dense lint, moisture deposits, and physical obstructions from the entire exhaust conduit. While homeowners routinely empty the small lint screen inside the appliance drum, that mesh captures only a portion of airborne fibres. The remaining material enters the exhaust duct system, travelling through hidden metal piping toward the outdoor termination hood. Over months of routine laundry, these warm, damp fibres stick to duct walls, creating a thick, felted barrier that gradually restricts the escape of exhaust air.
A proper cleaning procedure addresses the complete venting assembly rather than just vacuuming around the back of the appliance. Technicians clean the flexible transition connector, the rigid metal interior ducting, any inline booster fan housings, and the outdoor louvred vent hood. Specialized rotating whips and brush heads dislodge compacted lint without puncturing or separating thin duct seams. Simultaneous negative pressure extraction collects the dislodged debris into sealed containment units, ensuring loose lint, fine dust, and allergen particles do not escape into your living areas or laundry room air.
Restoring clear duct passages allows your dryer to exhaust moist vapour and heat according to original manufacturer specifications. When air moves without resistance, mechanical components like heating elements, drive belts, thermostats, and electronic control boards experience less thermal strain. Clothes dry in normal cycle durations, fabric textures suffer less friction damage, and your laundry room stays noticeably cooler. Thorough exhaust cleaning creates a safer, more economical laundry environment that functions reliably day after day.
- Mechanical scouring of the full exhaust run from appliance collar to exterior cap
- Clearing of the outdoor hood louvres, pest screens, and backdraft dampers
- Complete removal of combustible lint felting clinging to duct walls
- Airflow testing before and after service to verify unobstructed exhaust volume
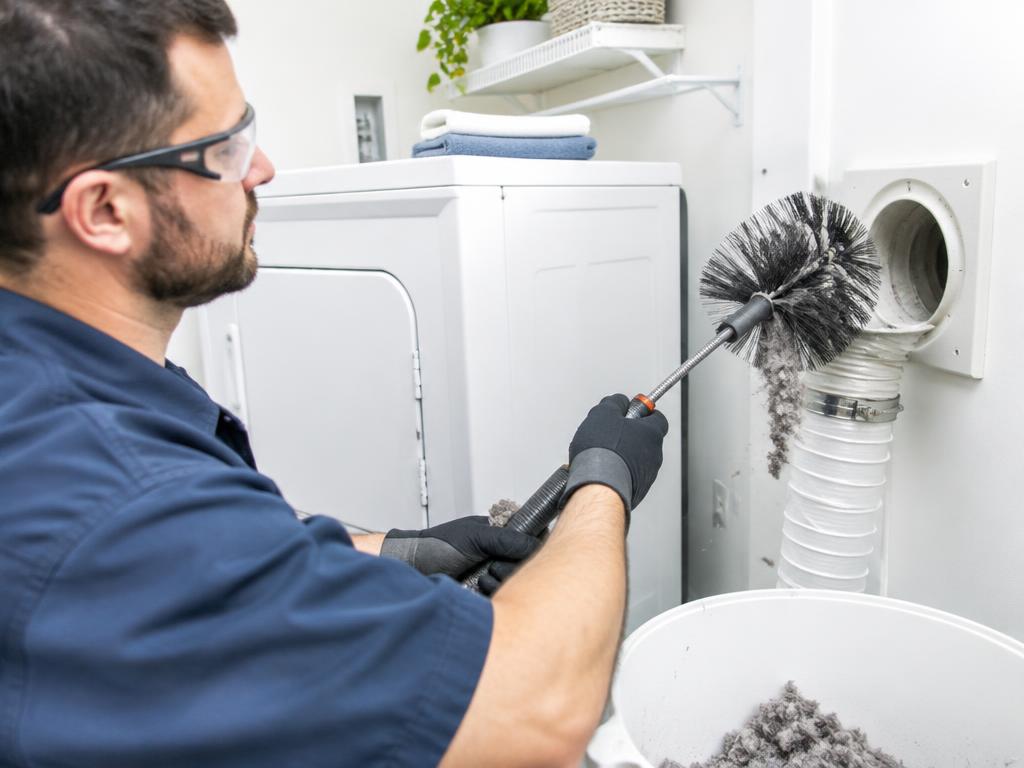
Restoring safe airflow and appliance efficiency across Markham homes through thorough, lint-clearing vent care.
Self-check
Warning signs you need clogged dryer vent cleaning
Extended Drying Cycles
Clothes require two or three consecutive cycles to dry completely. When humid exhaust cannot escape due to dense lint accumulation, warm moisture stays trapped within the tumbler drum, dramatically increasing drying times and energy bills.
Excessive Exterior Cabinet Heat
The top, sides, or door of your dryer feel scorching hot to the touch during operation. Blocked vents trap intense heat inside the metal cabinet, pushing internal temperatures beyond safe limits and straining internal thermal switches.
Musty Odours on Clean Laundry
Finished laundry emerges with a damp, sour, or stale smell rather than smelling fresh. Sluggish airflow prevents humid vapour from venting outside, leaving clothes stewing in warm, stagnant moisture that encourages bacteria and unpleasant fabric odours.
Inoperative Outdoor Vent Flapper
The exterior damper flap barely lifts or remains motionless while the appliance runs. A healthy exhaust creates strong airflow that pushes the flap wide open; sluggish movement signals heavy duct blockage or a damper frozen by winter frost.
Burning Odour in the Laundry Room
A distinct, acrid smell of scorching dust or burning fabric fills your utility space. This warning indicates trapped lint is directly contacting heating elements or combustion chambers, creating an immediate fire hazard that demands immediate shutdown.
Excessive Lint Accumulation Behind Appliance
Noticeable layers of fuzzy lint gather on the floor, baseboards, or wall behind the dryer. This reveals that exhaust backpressure is forcing lint through small connection gaps, loose joints, or torn transition ducting inside your laundry room.
The Impact of Ontario Freeze-Thaw Weather on Dryer Ducts
Southern Ontario experiences severe seasonal temperature swings that alter how laundry exhaust ducts perform. During cold winter spells in Markham, hot, moisture-saturated air from your dryer collides with freezing duct surfaces near exterior walls and unheated crawlspaces. This sudden thermal shock triggers immediate condensation along the duct interior. Instead of escaping outside as harmless steam, water vapour turns into sticky liquid droplets that coat the metal pipe, trapping passing lint particles and forming a dense, glue-like slurry along the bottom of the exhaust line.
As outdoor temperatures drop below freezing overnight, this wet lint mixture freezes into solid ice ridges inside the duct. Repeated freeze-thaw cycles build layered blockages that drastically choke duct diameter, especially near outdoor termination caps and north-facing exterior walls. Outdoor louvred dampers frequently freeze shut when escaping condensation turns to frost, sealing the exhaust path completely. When the damper cannot swing open, moist air backs up into the house, creating wall cavity dampness, peeling paint, and accelerated drywall deterioration in surrounding rooms.
Spring thaw brings its own venting complications as melting frost and retained interior condensation foster mould development inside uninsulated pipes running through cold attics or soffits. Moisture pooling inside dipping duct segments can even rust through metal seams or cause flexible duct collars to sag under water weight. Regular maintenance tailored to local climatic demands prevents frozen dampers, condensation pooling, and cold-weather exhaust failure, keeping your home warm, dry, and structurally sound throughout every challenging winter season.
- Severe condensation pooling when warm laundry exhaust meets freezing winter metal
- Exterior flapper dampers freezing shut under persistent frost and ice accumulation
- Formation of dense, frozen lint dams within unheated wall and attic pipe sections
- Spring moisture runoff that encourages mildew, mould growth, and duct corrosion
Primary Causes of Severe Dryer Vent Blockages
Several mechanical, installation, and lifestyle factors contribute to dangerous blockages inside residential dryer vents. One widespread cause in older Markham homes is improper duct material, specifically ribbed vinyl or corrugated foil flexible transition hoses. The deep internal ridges of accordion-style flex piping trap lint easily, creating turbulence that slows down air movement. Over time, these flimsy ducts kink, crush behind heavy appliances, or sag between supports, creating localized pinch points where lint accumulates rapidly until all airflow ceases.
Vent routing also plays a critical role in how quickly blockages form within a home. Exhaust lines with long horizontal runs, multiple sharp ninety-degree elbows, or vertical rises toward rooftop terminations create high static resistance. As exhaust velocity drops, heavier lint particles lose momentum and settle along pipe floors before reaching the outside. Improper duct fasteners, such as sheet metal screws protruding into the air stream, act like tiny hooks that snare passing clothing fibres, building massive lint knots inside concealed drywall cavities.
External and domestic factors complete the list of primary blockage triggers. Birds, squirrels, and rodents often push through damaged exterior vent covers to build nests in warm duct openings, entirely sealing the exhaust path with twigs, straw, and leaves. Indoors, washing heavy wool blankets, pet bedding, and thick towels generates exceptional volumes of coarse fibre that overwhelm lint filters. When heavy laundry habits combine with restrictive duct paths, severe blockages develop much faster than many homeowners anticipate.
- Use of corrugated, flexible foil or plastic ducting that snares loose fibres
- Excessive pipe lengths featuring multiple sharp elbows and vertical rises
- Protruding sheet metal screws inside the duct that collect snagged debris
- Animal nesting materials entering through damaged or unshielded outdoor caps
Our Inspection and Airflow Diagnostic Methodology
Markham Chimney Services approaches every venting assignment with structured diagnostic evaluation rather than casual guesswork. We begin by inspecting the appliance connection point, evaluating the transition hose material, integrity, and routing alignment. Our technicians measure duct backpressure and airflow velocity using sensitive digital anemometers to establish baseline exhaust performance. If static pressure reads unusually high or exhaust velocity falls below acceptable operating parameters, we know a significant blockage or structural pinch point exists along the internal line.
We also examine the entire accessible run across basement ceilings, utility rooms, or utility closets, checking for secure support hangers, taped airtight joints, and correct pitch. When a duct run is concealed behind finished ceilings or within multi-floor chase walls, we utilize flexible inspection cameras equipped with LED illumination. This visual feed allows us to pinpoint lint accumulations, broken joints, animal nesting debris, or hidden water pockets without cutting unnecessary holes in your finished drywall or ceiling plaster.
The diagnostic process finishes at the outdoor termination point on your brick, stone, or siding exterior. We examine the hood assembly to ensure backdraft dampers open freely under exhaust pressure and close firmly when the cycle stops. Technicians verify that exterior caulking remains water-resistant, louvres are free of lint crusts, and protective pest guards prevent animal access without catching lint. This thorough diagnostic method identifies not only where the duct is blocked, but also why the clog formed in the first place.
- Digital anemometer airflow velocity and static backpressure measurements
- Direct visual or borescope camera exploration of concealed duct interior runs
- Assessment of transition hose integrity, pitch, support spacing, and joint sealing
- Outdoor termination damper, caulking, and pest-barrier operational verification
"After noticing smoke backing into the room, I called for an inspection in Buttonville. Their technician diagnosed a minor blockage quickly, cleared it thoroughly, and explained how to avoid future issues. Excellent service."

Our process
How we handle your clogged dryer vent cleaning, step by step
- 1
Initial Assessment and Airflow Testing
We examine the dryer connection, check transition hose material, and measure baseline exhaust velocity using digital anemometers. We then inspect the exterior hood to determine overall duct resistance.
- 2
Appliance Disconnection and Workspace Prep
Our technicians carefully shift the dryer forward, protecting your flooring with mats. We decouple the transition pipe and connect our heavy-duty negative pressure vacuum system to contain loose debris.
- 3
Mechanical Rotary Brush Scouring
We guide specialized rotating nylon brush rods through the full length of the duct. The spinning motion breaks apart compacted lint clogs, while vacuum extraction pulls all loosened debris into sealed containers.
- 4
Exterior Termination Service
We clear the outdoor vent hood, clean accumulated debris from the backdraft damper, check the pest screen, and verify that the flap swings smoothly without binding against ice, frost, or warped housing.
- 5
Reconnection and Final Verification
We reattach the dryer using rigid or semi-rigid aluminum ducting, tape joints securely, reposition the appliance, and run a complete airflow verification test to ensure smooth, compliant exhaust performance.
Our Professional Cleaning and Clearing Process
Our professional cleaning process uses dedicated, non-invasive duct clearing equipment built to handle tough residential blockages safely. We start by moving the dryer away from the wall with care, taking steps to protect hardwood, tile, or vinyl flooring from scuffs. We disconnect the transition duct and couple the wall collar to an industrial containment vacuum equipped with high-efficiency particulate filtration. This negative air setup guarantees that fine dust, lint clouds, and microscopic allergens cannot escape into your living space during the cleaning operation.
Next, we introduce specialized rotary brush systems driven by flexible drive rods through the duct network. As the soft-bristle nylon brush spins inside the pipe, it scours the entire interior circumference, releasing hardened lint scale, moisture-caked sediment, and hidden debris plugs without scratching or dislodging sheet metal connections. The powerful vacuum airflow draws dislodged debris straight into sealed collection bags. We advance the tooling across the entire length of the run until it reaches the exterior vent hood, ensuring every linear foot is scoured clean.
Once internal mechanical brushing is complete, our technicians inspect and wash the outdoor damper hood, removing any lint crust that might prevent full closure. We reattach the appliance using smooth-walled, fire-safe semi-rigid or rigid aluminum connectors, securing every joint with foil-backed HVAC tape. Finally, we run the dryer through a test cycle to confirm that backdraft flaps move freely outdoors and that static pressure readings match optimal baseline airflow benchmarks before packing our gear.
- Containment isolation using high-powered vacuum suction to keep indoor air clean
- Forward-sweeping rotary brushes that scrub duct walls without damaging pipe seams
- Exterior damper cleaning, lubrication, and manual flap movement verification
- Post-cleaning operational airflow confirmation with calibrated measurement tools
Household Safety, Fire Prevention, and Carbon Monoxide
Combustible lint accumulation inside dryer exhaust ducts represents one of the most persistent yet avoidable fire hazards in modern Canadian residences. Lint consists of microscopic, highly flammable fabric fibres that ignite readily when exposed to extreme heat. When an exhaust pipe clogs, the appliance heating chamber cannot dissipate thermal energy normally. High-limit thermostats can fail under sustained over-temperature conditions, allowing glowing heating elements or electrical sparks to ignite trapped lint, which can rapidly send flames spreading through floor joists and concealed wall framing.
For homes operating natural gas clothes dryers, a blocked vent introduces the grave danger of carbon monoxide accumulation. Gas dryers generate toxic combustion by-products, including carbon monoxide, that must vent completely to the outdoors. When exhaust channels become choked with lint, dangerous exhaust fumes push backwards into the laundry room and adjacent living zones. Because carbon monoxide is completely colourless, tasteless, and odourless, occupants may suffer headaches, nausea, or severe poisoning without ever realizing the dryer exhaust is obstructed.
We approach dryer venting with the same safety-conscious mindset applied to solid fuel and chimney systems, aligning our work with best practices derived from CSA venting standards and WETT-style inspection discipline. We recommend installing certified carbon monoxide alarms outside every sleeping area and on every level of the home where fuel-burning equipment operates. Maintaining clean, rigid, fire-resistant exhaust paths protects your family against invisible toxic gases and destructive chimney-like duct fires, preserving overall household security.
- Substantial reduction of combustible lint fire risks in hidden structural chases
- Prevention of toxic carbon monoxide and combustion vapour backdrafting from gas units
- Elimination of excessive appliance operating temperatures that trigger component failure
- Adherence to CSA-aligned smooth-wall metal duct safety and installation principles
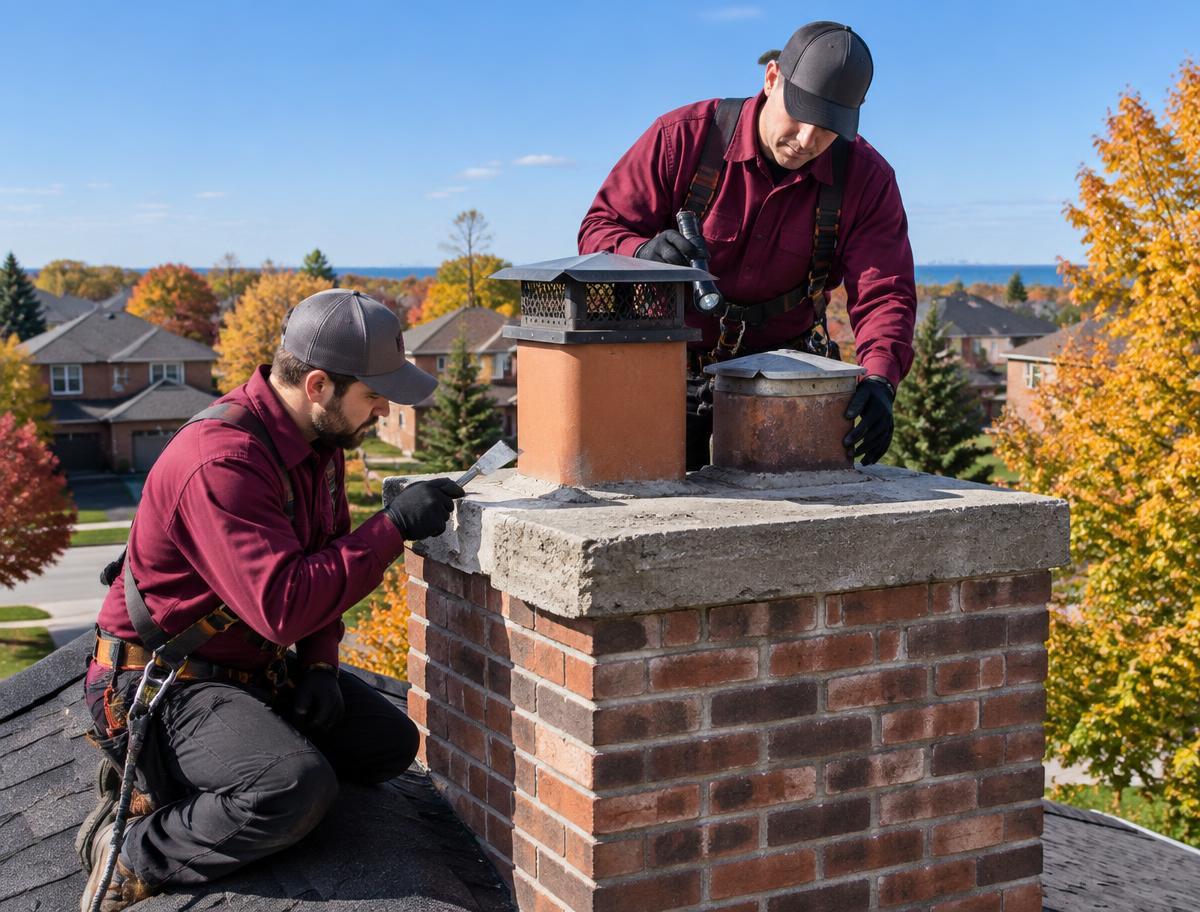
Essential Preventative Maintenance Tips for Homeowners
While professional clearing is necessary for deep duct runs, regular homeowner habits go a long way in preventing sudden, severe blockages. The most critical routine habit is cleaning your appliance lint filter before or after every single laundry load. Periodically, wash the mesh screen with warm water, mild dish soap, and a soft nylon brush to remove invisible chemical films left behind by fabric softeners and dryer sheets. These waxy films plug microscopic mesh pores, forcing loose lint to bypass the filter and enter the exhaust system.
Pay close attention to physical clearance around the rear of your dryer. Ensure the appliance has not backed up tightly against the wall, which can crush or pinch flexible transition piping. Avoid storing laundry baskets, detergent bottles, or sorting hampers against the exhaust tube, as accidental pressure can deform thin metal connections. Additionally, walk around the outside of your house once a month while the dryer runs to verify that the exterior flapper moves smoothly, blows warm air vigorously, and remains free of clinging lint or garden overgrowth.
Manage laundry loads thoughtfully to reduce the volume of loose fibres entering your exhaust network. Avoid overloading the drum, which restricts tumbling action and forces damp fabric against the exhaust outlet. When drying lint-heavy textiles like chenille bedspreads, bath mats, or fleece pullovers, check the lint screen halfway through the drying cycle. Incorporating these simple habits into your household routine prolongs the time between cleanings and keeps your appliance operating safely and smoothly.
- Clean the lint mesh screen before every drying cycle without exception
- Wash the filter with warm soapy water every few months to remove waxy residue
- Inspect the exterior exhaust hood monthly to confirm flappers open and close freely
- Keep the utility space behind the dryer clear to prevent crushing the transition pipe
Selecting a Qualified Venting Specialist in Markham
Hiring the right contractor to service your home exhaust systems requires careful consideration of local experience, specialized tooling, and technical competence. Generic handymen and budget cleaning crews often rely on household shop vacuums or cheap leaf blowers that merely compact wet lint deeper into pipe elbows or blow hazardous debris into ceiling cavities. A qualified venting professional utilizes dedicated rotary sweeping equipment, industrial containment vacuums, and diagnostic airflow sensors that thoroughly clean without risking duct separation behind drywall.
Homeowners across Markham and the Greater Toronto Area should look for contractors who demonstrate genuine familiarity with regional building designs. Our local housing stock includes everything from post-war brick bungalows in Unionville to modern multi-level custom builds in Angus Glen, each featuring unique duct runs, masonry penetrations, and airflow challenges. A reputable company evaluates the entire duct trajectory, checks building code compliance, and provides practical advice on correcting risky transition hoses, uninsulated attic runs, or missing backdraft hoods.
Transparency and ethical business practices should guide your hiring choice. Avoid contractors who quote suspiciously low baseline prices over the phone only to push aggressive, unneeded upsells once inside your home. Markham Chimney Services operates on clear, honest communication, transparent estimates, and thorough workmanship. We treat your property with complete respect, wear protective footwear, protect your flooring, and leave your laundry room spotless, ensuring your complete confidence from initial inspection through final airflow test.
- Insistence on commercial-grade rotary sweeping and negative air extraction tools
- Familiarity with diverse Markham home architectures and venting duct challenges
- Clear, itemized pricing without high-pressure sales pitches or hidden fees
- Respectful in-home service with floor protection, cleanup, and post-work airflow checks
Average pricing in Markham
$179 – $389
- Inspection / diagnostic
- $89 – $129
- Typical time on site
- 1 to 2 hours typical on site
- Parts and materials
- Replacement semi-rigid aluminum transition hoses, exterior hoods, heavy-gauge pest caps, and foil duct tape quoted separately as needed.
- What moves the price
- Total duct length and number of directional elbows between appliance and outdoors · Vent exit location such as ground level, second storey exterior wall, or steep roof pitch · Severity of clog including wet lint sludge, bird nests, or detached concealed joints
Estimated local market range, not a quote. All estimates are in Canadian dollars and exclude 13% Ontario HST. Your exact price is confirmed before any work begins.