

A clothes dryer is one of the hardest working appliances in any modern Canadian home, but its exhaust system is frequently neglected until a major problem develops. Many homes throughout Markham still rely on outdated, fragile flexible foil or ribbed plastic vent lines tucked behind basement walls or under floorboards. These materials collect dense lint, sag under moisture weight, and create immediate fire hazards when heat builds up during normal operation. As an independent chimney and venting service company based at 4418 Highway 7 East in Markham, we specialize in diagnosing and replacing compromised dryer exhaust pathways with smooth, durable rigid metal systems that meet modern building safety standards.
Operating a dryer in our regional climate puts unique demands on exhaust infrastructure that indoor-only appliances never experience. Warm, moisture-saturated air from damp laundry must travel safely to the exterior of your house without cooling prematurely inside wall cavities. When exhaust ducts run through unconditioned basements, crawlspaces, or cold outer walls, improper materials cause heavy condensation, lint clogs, and structural mould. Upgrading your exhaust run to a properly insulated rigid aluminum or galvanized steel line protects your property value, cuts your electrical usage, and prevents severe home fires across Markham neighbourhoods and the greater Greater Toronto Area.
Dryer Vent Replacement: visit summary
Dryer Vent Replacement: lint cleared from the duct and exterior hood to cut fire risk and shorten drying times. Serving Markham and the Greater Toronto Area (GTA). The estimated local market range is $280 – $650, not a fixed company rate. The final scope and quote are confirmed before work begins.
| Estimated market range | $280 – $650. All estimates are in Canadian dollars and exclude 13% Ontario HST. |
|---|---|
| Typical time | 2 to 4 hours typical on-site time |
| Price factors | Total duct run length and number of directional bends required; Accessibility through finished basements, drywall ceilings, or crawlspaces; Need for masonry core drilling or cold-weather duct insulation sleeves |
| Routine signs to discuss | Clothes Taking Multiple Cycles to Dry; Dryer Cabinet Is Hot to the Touch; Burning Odour During Operation; Outdoor Flapper Does Not Open; Visible Lint Accumulation on Walls; Presence of Flexible Plastic or Foil Pipe |
Understanding Dryer Vent Replacement Versus Basic Cleaning
Homeowners often believe that a quick rotary brush cleaning will resolve every laundry exhaust concern. While periodic brushing removes loose debris, it cannot fix structural failures such as punctured foil lines, crushed transition hoses, or duct runs that violate length limitations. Thin flexible tubing can easily tear during aggressive cleaning procedures, releasing heated lint directly into your wall cavities or ceiling spaces. Replacement provides a complete mechanical reset, replacing hazardous materials with heavy-duty metal pipes that maintain smooth interior surfaces and proper mechanical joins.
When an exhaust pathway features improper slope, excessive bends, or screws protruding into the air stream, lint gathers continuously regardless of how frequently you hire a cleaner. Screws driven into sheet metal pipes act as tiny hooks that snag wet fibers until a dense blockage forms. Our replacement service eliminates these structural flaws by utilizing smooth-walled rigid ducting fastened with heat-resistant foil tape instead of screws, guaranteeing that air moves quickly and cleanly without unexpected turbulence or lint accumulation.
Choosing replacement is essential when an existing line is manufactured from white vinyl or spiral-wound foil. Both materials are combustible and can melt quickly if an appliance thermal limiter fails. A rigid metal replacement creates a continuous, non-flammable conduit from the back of your clothes dryer directly to the outdoor exhaust cap. This gives your household lasting security, knowing that hot exhaust gases and stray sparks are completely contained within durable galvanized metal.
- Replaces flammable vinyl or corrugated foil with durable rigid metal
- Removes internal screws that catch wet lint and trigger blockages
- Corrects poor slope to avoid trapped water puddles inside ductwork
- Eliminates crushed transition runs behind tight laundry room walls
- Establishes a smooth interior finish for optimal airflow velocity
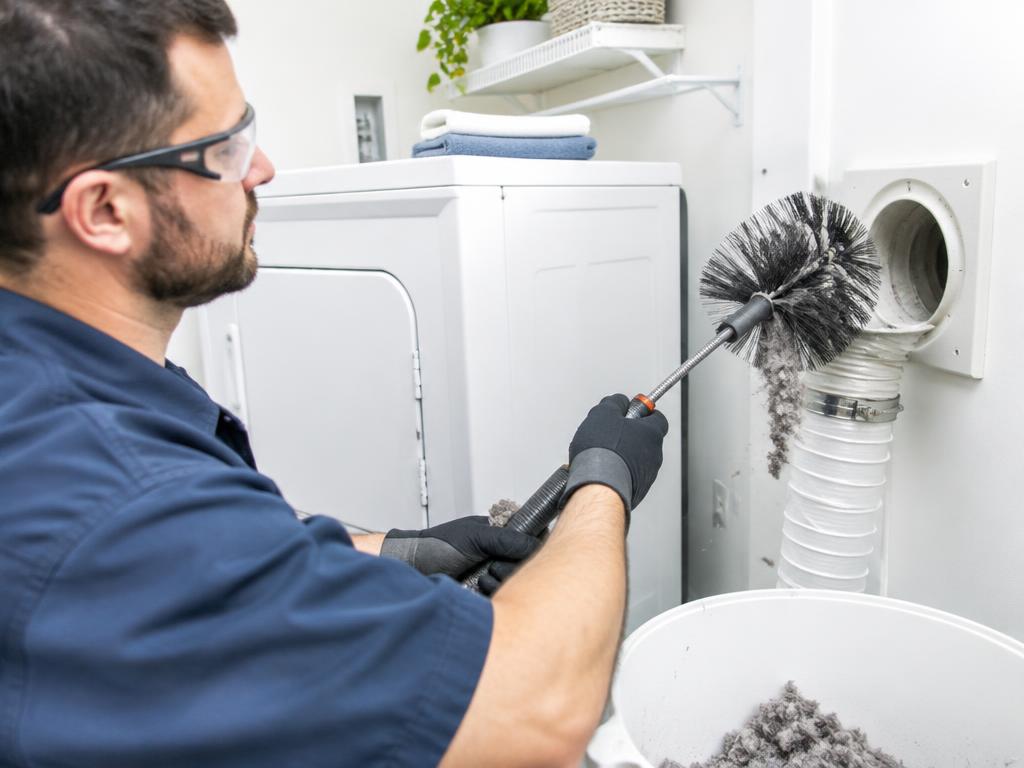
Reliable, code-compliant dryer vent replacement safeguarding Markham homes against lint fires and moisture damage.
Self-check
Warning signs you need dryer vent replacement
Clothes Taking Multiple Cycles to Dry
When thick bath towels and denim remain damp after a standard drying cycle, airflow is restricted. Blocked or crushed ducting traps moisture inside the drum, forcing heating coils to run twice as long, wasting electricity and straining internal components.
Dryer Cabinet Is Hot to the Touch
If the exterior metal surfaces of your dryer feel excessively hot during operation, heat is trapped inside the chassis. Restricted exhaust pathways cause severe heat buildup that can trip internal safety switches and ignite dry lint inside the appliance.
Burning Odour During Operation
A distinct scorching or burning smell in your laundry area indicates lint is collecting against heating elements or within compromised pipe walls. This is an urgent warning sign that requires immediate appliance shutoff and a full venting evaluation.
Outdoor Flapper Does Not Open
When your dryer is running, the exterior damper flapper should open wide under strong airflow. If the flapper barely moves or remains closed, the line is heavily clogged, disconnected inside the home, or mechanically restricted by ice and debris.
Visible Lint Accumulation on Walls
Discovering lint dust collecting on the wall behind your dryer or on basement joists indicates a torn, disconnected, or unsealed exhaust pipe. Escaping lint deposits moisture and airborne particulates directly into your home framing and breathable indoor air.
Presence of Flexible Plastic or Foil Pipe
If your current exhaust run is made of white corrugated vinyl or flimsy plastic-covered wire foil, it is inherently unsafe. These outdated materials violate modern fire codes, puncture easily, sag with moisture, and ignite rapidly under high heat conditions.
The Freeze-Thaw Impact on Markham Dryer Ducts
The climate in southern Ontario brings sharp seasonal shifts that place substantial thermal stress on home venting systems. During winter, sub-zero exterior temperatures turn outer home walls and unheated basement joists into cold zones. When hot, humid air from your dryer meets these cold metal surfaces, rapid condensation occurs inside the pipe. If the ductwork is uninsulated or runs too long, water pools inside the lower sections, creating a sticky paste with loose lint that swiftly chokes the exhaust line.
As temperatures drop further overnight, pooled water inside poorly installed ducts can freeze solid, narrowing the exhaust passage or completely blocking the pipe with thick ice. This ice buildup causes high backpressure on your clothes dryer, forcing the motor to strain and triggering high-heat switches. In split-level homes and older brick bungalows common across Markham, uninsulated runs routed through unheated garages or cold crawlspaces are particularly vulnerable to this damaging winter freeze-thaw cycle.
Exterior wall hoods also experience winter complications when outdoor exhaust flappers freeze shut from damp air mist. When the damper cannot swing open freely, hot air backs up into the house, causing humidity to condense on basement rim joists and drywall. Our replacement service incorporates properly sealed, weather-resistant exterior vent hoods and insulated ducting designed specifically to handle deep winter frost without accumulating interior condensation, protecting structural framing from rot and toxic mould spores.
- Prevents winter condensation from pooling in unheated basement runs
- Eliminates internal ice dams that choke appliance exhaust velocity
- Protects wooden floor joists and insulation from moisture rot
- Installs cold-weather exterior termination hoods that resist freezing shut
- Applies insulation wraps to cold duct sections crossing unconditioned areas
Common Causes of Premature Exhaust Duct Failure
Many laundry exhaust problems stem from the original installation choices made when the house was built or renovated. Contractors often routed flexible accordion tubing through tight floor joists because it was quick and cheap to install. However, the deep internal ridges of flexible hoses create intense air friction, cutting exhaust velocity in half and allowing heavy lint particles to fall out of suspension before they reach the outside wall, leading to rapid, deep blockages.
Physical damage is another common culprit behind ductwork failure in active homes. When clothes dryers are pushed back against walls to maximize laundry room floor space, semi-rigid transition hoses are easily crushed or kinked. A crushed pipe restricts airflow just like a pinched garden hose, causing intense heat to build up inside the dryer cabinet. Over months of regular use, crushed foil develops pinhole tears, venting humid, lint-laden air into living spaces.
Pest intrusion and animal damage also destroy residential exhaust pathways across suburban neighbourhoods. In search of warmth during chilly autumn months, birds, mice, and squirrels often push through damaged outdoor dampers and build nests inside the pipe. Nesting materials combined with accumulated lint create an immediate, combustible plug. Once pests damage internal duct connections, replacement becomes the only sanitary and safe option for restoring proper ventilation.
- Crushed or flattened flexible hoses behind heavy laundry equipment
- Use of corrugated flexible foil that traps lint along internal ridges
- Pest intrusion from birds, rodents, or squirrels seeking warm nesting spots
- Deteriorated cloth duct tape that dries out, cracks, and drops open
- Improper duct routing with sharp right-angle bends that stall exhaust air
Fire Prevention and Indoor Air Quality Protection
Dryer lint is exceptionally flammable, consisting of tiny, dry cellulose and synthetic fibers that ignite in an instant. When an exhaust pipe is clogged or degraded, heat generated by electric heating elements or gas burners cannot escape outside. Temperatures inside the appliance chassis elevate quickly until lint accumulated around the drum or within the exhaust collar catches fire. A rigid metal replacement system acts as a protective barrier, keeping heat contained while venting hot air safely away.
Indoor air quality is another critical reason to replace damaged exhaust systems promptly. When an exhaust line separates behind a drywall partition or inside a basement ceiling, gallons of moisture and clouds of fine lint dust are pumped directly into your home with every load. This airborne lint carries laundry chemical residues, fabric softeners, and microplastics that circulate through your central heating system, aggravating respiratory sensitivities and settling across living areas.
Excess moisture introduced by a disconnected or leaking exhaust line creates the ideal environment for fungal development within wall cavities. In tight modern homes, this trapped humidity cannot escape naturally, leading to musty odours, peeling paint, and black mould along baseboards. Installing a seamless, airtight rigid metal exhaust line guarantees that all moisture and airborne particulates exit your home cleanly, preserving clean indoor air and dry structural assemblies.
- Contains high heat within non-combustible rigid metal boundaries
- Prevents fine lint dust from entering your furnace or heat pump ducts
- Stops hidden moisture discharges that trigger toxic mould growth
- Reduces stress on appliance thermal fuses and internal heating coils
- Maintains sanitary laundry environments free from stale, humid odours
"I needed a new chimney cap. The installer arrived in Angus Glen, walked me through cap options, and fitted the perfect one with care. Cleanup was spotless and now I feel protected against rain and pests."
Our process
How we handle your dryer vent replacement, step by step
- 1
Site Evaluation and Airflow Diagnostic
We examine the full venting path from laundry room to exterior wall, measuring duct length, counting directional bends, and testing exhaust velocity to identify hidden structural blockages.
- 2
Safe Disconnection and Extraction
Our technicians pull the dryer, disconnect old lines, and extract hazardous vinyl, foil, or corroded duct sections while capturing trapped debris to keep your home tidy.
- 3
Precision Rigid Metal Installation
We install code-compliant four-inch rigid galvanized steel or aluminum piping along the most direct route, orienting joints with airflow and sealing seams with commercial foil tape.
- 4
Exterior Termination and Weather Sealing
We mount a durable, pest-resistant exterior vent hood, ensuring proper outdoor clearances, smooth damper operation, and an airtight exterior weather seal against rain, draft, and insects.
- 5
Airflow Verification and Final Calibration
After reconnecting your appliance with a heavy-duty transition duct, we run a full operational cycle, verifying outdoor damper movement, optimal backpressure levels, and complete fire-safe performance.
Our Thorough Inspection and Routing Diagnostic
Every successful replacement begins with an honest, detailed evaluation of your home layout. We start by locating your laundry appliances, mapping the entire vent run from the back collar through every wall, ceiling, and floor penetration until it exits the building. We evaluate the total equivalent length of the line, counting every elbow and turn to ensure the design complies with strict residential building codes and manufacturer specifications for maximum exhaust run length.
Next, we inspect the condition of all accessible pipe segments, checking for improper materials, unsealed seams, reverse slopes, and structural blockages. Using sensitive airflow meters, we measure backpressure and exit velocity at the outdoor termination point. This testing reveals hidden restrictions buried deep inside finished walls or ceilings, giving us the clear technical data needed to design an optimized, direct replacement pathway that minimizes turns and maximizes airflow performance.
We also examine the exterior termination hood, checking its clearance from grade, gas meters, windows, and outdoor air intakes. If the existing hood is mounted too close to ground level or lacks an operational pest damper, we note these defects. Once our physical diagnostic is complete, we present you with a straightforward plan outlining the safest, most efficient pathway for your new rigid metal exhaust system before any work begins.
- Complete structural mapping from appliance collar to exterior wall cap
- Calculations of equivalent duct length including all directional elbows
- Airflow velocity and backpressure testing to detect hidden restrictions
- Inspection of termination hood clearance above snow and grade levels
- Clear, written explanations of proposed duct rerouting and upgrades
The Complete Replacement and Installation Process
Once you approve our service plan, our technicians begin by carefully disconnecting the appliance and extracting the old, hazardous exhaust ducting. We protect your laundry room floors and nearby walls with durable drop cloths, taking care to contain all trapped lint, debris, and dust during extraction. Damaged flexible hoses and corroded pipes are cleanly removed from joist bays and wall cavities so the new run has an unobstructed pathway.
We then install premium four-inch rigid aluminum or galvanized steel ductwork along the shortest, most direct route to the outside. Each section is fitted with male ends facing the direction of airflow, preventing interior lips that could snag loose lint. We secure all pipe joints using high-temperature, code-approved aluminum foil tape, strictly avoiding sheet metal screws that breach the pipe. Heavy-duty suspension hangers are fastened at regular intervals to maintain steady support and prevent duct sagging.
The project concludes with installing a durable exterior vent cap sealed against moisture intrusion with exterior-grade caulking. We connect your appliance using a heavy-duty semi-rigid transition duct, reposition the machine, and conduct a thorough airflow and operational test. We verify that the exterior damper opens fully under exhaust pressure and closes tightly when the cycle ends, confirming your laundry system is completely fire-safe and ready for daily use.
- Safe extraction and disposal of degraded foil, vinyl, or corroded ducting
- Precision assembly of heavy-gauge rigid metal with oriented slip joints
- Airtight joint sealing with high-heat metal foil tape without snagging screws
- Secure mechanical anchoring using galvanized strapping to eliminate sags
- Complete live-cycle airflow testing and exterior weather seal application
Carbon Monoxide Safety Protocols for Gas Dryers
Homes equipped with gas clothes dryers require exceptional diligence during exhaust replacement. A gas dryer produces toxic combustion by-products, including deadly carbon monoxide, which must be vented entirely outdoors alongside moisture and lint. If a gas vent separates, leaks, or becomes restricted, colourless and odourless carbon monoxide can spill into your living quarters, posing an immediate life safety hazard to your family and pets.
During every gas dryer vent replacement, we adhere to strict safety practices aligned with CSA standards and mechanical fuel codes. We inspect the appliance draft hood, check the flue connection, and verify that the duct material is entirely non-combustible and airtight along its entire length. Gas dryers cannot tolerate flexible vinyl or thin multi-ply foil under any circumstances, making rigid metallic venting an absolute non-negotiable requirement for your home.
We also evaluate the mechanical room environment to verify adequate combustion air is present. If your dryer shares an enclosed utility room with a gas furnace or water heater, competing air demands can cause backdrafting. We ensure proper clearances around appliances, verify your home has functioning carbon monoxide alarms installed near sleeping areas, and test the entire installation under full draft conditions to confirm safe, zero-leak combustion venting.
- Rigid non-combustible metal venting ensuring zero carbon monoxide leakage
- Air-tight seam sealing to prevent toxic exhaust spill into utility rooms
- Evaluation of makeup air supplies in closed laundry and furnace spaces
- Adherence to CSA and building code clearance guidelines for gas appliances
- Placement checks for operational carbon monoxide detectors on every level
Ongoing Maintenance and Long-Term Duct Preservation
A newly installed rigid metal exhaust system will serve your household reliably for decades when supported by basic, sensible maintenance habits. The most important daily practice is cleaning your clothes dryer lint filter before or after every single load. A clean filter catches the vast majority of fabric fibers, preventing heavy lint burdens from entering the main exhaust duct and reducing overall wear on the venting system.
Outside your home, make it a regular habit to inspect the exterior vent termination cap, especially following severe winter blizzards. Heavy snowdrifts can quickly cover ground-level vent hoods, choking off exhaust airflow and causing heat to back up into the appliance. Clear away accumulated snow, ice, and autumn leaves, and verify that the gravity flapper or louver blades open smoothly when the dryer runs and seal shut when it stops.
Pay attention to how quickly your laundry dries as the years pass. If you notice that heavy towels suddenly require two cycles to dry completely, or if the top of the dryer feels unusually hot to the touch, do not wait for a complete stoppage. Contact our team to inspect the system, check airflow rates, and ensure your rigid metal pathway remains clear, watertight, and fully protective for your home.
- Clean the appliance lint screen before every load to reduce duct burden
- Keep exterior wall hoods cleared of snow, ice, leaves, and garden debris
- Check external damper flappers periodically to ensure they swing freely
- Avoid shoving laundry baskets or heavy equipment against transition hoses
- Schedule an airflow checkup whenever cycle dry times begin to increase
Average pricing in Markham
$280 – $650
- Inspection / diagnostic
- $89 – $140
- Typical time on site
- 2 to 4 hours typical on-site time
- Parts and materials
- Rigid metal piping, insulated duct sleeves, exterior damper hoods, and semi-rigid transition kits quoted based on run length
- What moves the price
- Total duct run length and number of directional bends required · Accessibility through finished basements, drywall ceilings, or crawlspaces · Need for masonry core drilling or cold-weather duct insulation sleeves
Estimated local market range, not a quote. All estimates are in Canadian dollars and exclude 13% Ontario HST. Your exact price is confirmed before any work begins.